
What if I told you that the guitar sitting in countless closets around the world could unlock something profound in just 30 minutes a day? Here’s what surprises most people: you don’t need years of training to play your first recognizable song, and you definitely don’t need expensive equipment to start your musical journey.
I’ve watched thousands of beginners transform from hesitant strummers to confident players, and the secret isn’t talent or natural ability. It’s understanding exactly what you’re dealing with before you pick up that six-stringed puzzle for the first time.
In this comprehensive guide, you’ll discover everything you need to know about guitars before you play your first note. I’ll walk you through the different types of guitars and help you understand which one fits your goals and budget. You’ll learn how guitars actually create sound, master the language of tabs and chord diagrams, and discover the essential accessories that make learning easier.
How Guitars Produce Sound
Understanding how your guitar creates sound helps you connect with your instrument on a deeper level. It’s a blend of physics and craftsmanship, and it’s pretty amazing when you think about it.
Acoustic Guitars
On an acoustic guitar, the sound starts with the strings. When you pluck a string, it vibrates. This vibration is tiny on its own, but it’s carried down to the bridge of the guitar. The bridge then transfers that energy to the guitar’s soundboard, which is the large, flat top piece of wood.

The soundboard is like a big speaker cone. It vibrates in sync with the strings, but because it’s much larger, it moves a lot more air. This movement of air inside and outside the guitar’s body creates sound waves. The soundhole you see on the front of an acoustic guitar helps amplify and project these sound waves, directing them out into the world for your ears to hear. The wood used in the guitar’s body, its shape, and even the type of finish all play a role in the final tone.
Electric Guitars
Electric guitars work differently because they don’t rely solely on the physical vibration of the top wood to amplify the sound. Instead, they use electronics. When you pluck a string on an electric guitar, it vibrates, just like on an acoustic. However, beneath the strings are components called “pickups.”
Pickups contain magnets wrapped with coils of very thin wire. When the metal strings vibrate within the magnetic field of the pickups, they create tiny electrical currents. These currents are then sent through a cable to an amplifier. The amplifier takes these small electrical signals and boosts them, making them strong enough to drive a speaker. The speaker then converts those amplified electrical signals back into audible sound waves. This process allows electric guitars to be much louder and to create a huge variety of tones using effects pedals and different amplifier settings.
Classical Guitars
Classical guitars are a type of acoustic guitar, but they have some unique characteristics that affect their sound. The most significant difference is that classical guitars typically use nylon strings, rather than the steel strings found on most acoustic and electric guitars.
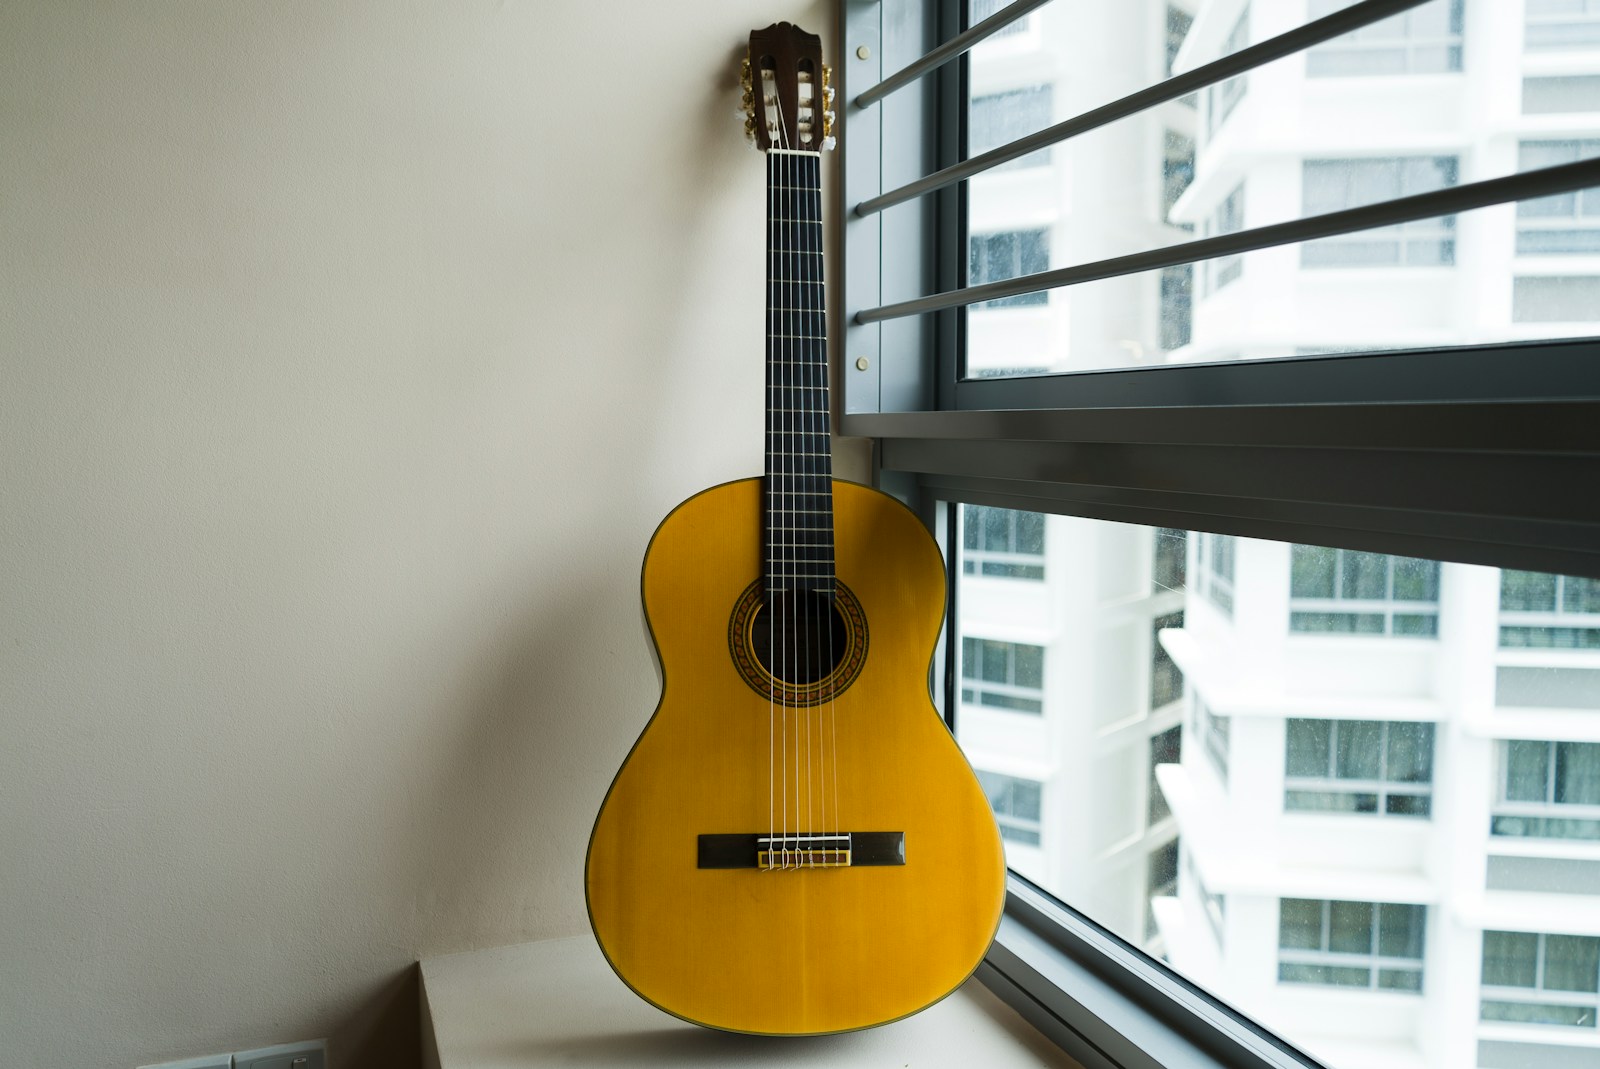
Nylon strings produce a warmer, mellower, and softer sound compared to steel strings. They also feel different under your fingers, often being easier for beginners or those with sensitive fingertips. Like other acoustic guitars, the vibrations of the nylon strings are transferred through the bridge to the soundboard, which then amplifies the sound through the guitar’s hollow body. The construction of classical guitars, including lighter bracing patterns inside and different wood choices, is also optimized to complement the sound characteristics of nylon strings, resulting in their distinctive, rich tone often associated with classical music, flamenco, and some jazz styles.
Choosing Your First Guitar
Picking out your first guitar can feel like a big decision, but it doesn’t have to be overwhelming. I want to help you think through what will be best for you as you start your journey.
Acoustic vs. Electric for Starters
This is often one of the first big questions aspiring guitarists ask. An acoustic guitar produces sound on its own, without needing any extra equipment. You just pick it up and play. This simplicity can be a real advantage when you’re just starting because you don’t have to worry about amps, cables, or pedals. The sound comes directly from the guitar’s body. If you dream of sitting around a campfire playing songs, or performing unplugged, an acoustic is a great choice.
An electric guitar, on the other hand, needs an amplifier to be heard. The sound it makes without an amp is very quiet. This means you’ll need to factor in the cost and space for an amp, and maybe a cable. However, electric guitars often have lighter strings and a thinner neck, which can sometimes make them easier on your fingers when you’re first building calluses. They also offer a huge range of sounds thanks to different effects and settings on the amp. If you’re inspired by rock, blues, or metal, an electric is probably what you’re thinking of.
Ultimately, there’s no single “right” answer here. Think about the kind of music you love and the sounds you want to make.
Budget-Friendly Options
You absolutely do not need to spend a fortune on your first guitar. Many excellent beginner guitars are available at very reasonable prices. You can find decent acoustic and electric starter packs that include the guitar and some basic accessories for a few hundred dollars. My advice is to set a budget before you start looking and stick to it. Remember, the goal right now is to get a playable instrument that inspires you to practice, not a professional-grade one.
Essential Accessories
Once you have your guitar, a few other things will make your life much easier.
- Picks: These small plastic pieces help you strum and pluck the strings. They come in different thicknesses, and you’ll find what feels best for you. I recommend starting with a variety pack.
- Tuner: This is crucial! A tuner ensures your guitar strings are at the correct pitch. You can buy a clip-on digital tuner, which is very easy to use, or even download a tuning app on your smartphone. Playing an out-of-tune guitar is frustrating and won’t sound good.
- Capo: A capo is a small clamp that you attach to the neck of your guitar. It effectively raises the pitch of all the strings, allowing you to play songs in different keys without changing your finger positions. It’s a handy tool, especially for acoustic players.
- Strap (for electric, sometimes acoustic): If you plan to play standing up, you’ll need a strap.
- Case or Gig Bag: To protect your guitar from dust and bumps, a case or a padded gig bag is a wise investment.
Where to Buy
You have a couple of main options for purchasing your first guitar.
- Online Stores: Websites offer a huge selection, often with competitive prices and the convenience of having the guitar delivered to your door. The downside is you can’t physically hold and play the guitar before buying it. You’re relying on reviews and descriptions.
- Local Music Stores: Shopping at a physical store allows you to see, touch, and even try out different guitars. The staff can also offer advice and help you find something that fits your budget and needs. They can also help with initial setup, which is a big plus for a beginner. Building a relationship with a local store can be incredibly beneficial for future needs like string changes or repairs.
My recommendation for a first-time buyer is to visit a local music store. The ability to hold the instrument, ask questions, and get some personalized advice is invaluable when you’re just starting.
Getting Started with Playing
Once you have your guitar in hand, the first step is to get comfortable with how you hold it. The right posture and hand placement are crucial for both comfort and effective playing. You want to make sure you’re relaxed, not tense.
Proper Posture and Hand Positioning
When you sit, keep your back straight but not rigid. You can rest the guitar on your right thigh if you’re right-handed, or your left thigh if you’re left-handed. The body of the guitar should be close to your own body, not pushed away. You want to be able to reach all the strings and frets without straining or twisting your body.
For your fretting hand (the hand that presses down on the strings), imagine you’re holding an apple. Your thumb should rest gently on the back of the neck, roughly in the middle, opposing your fingers. Your fingers should curve naturally, coming down on the strings with the tips. Avoid letting your palm touch the neck; you want space there so your fingers can move freely.

For your picking or strumming hand, let your arm rest comfortably on the body of the guitar. Whether you’re using a pick or your fingers, you want movement to come from your wrist and forearm, not just your elbow or shoulder. This gives you more control and a smoother sound.
Basic Finger Exercises for Beginners
Once you’re comfortable holding the guitar, some simple exercises can help build finger strength and coordination.
One great exercise is the “spider walk.” Place your index finger on the first fret of the low E string (the thickest string). Then, place your middle finger on the second fret, ring finger on the third, and pinky on the fourth. Lift your index finger and move it to the second string, still at the first fret. Continue this pattern across all six strings, then move back down. The goal is to keep each finger pressing down until the next finger is in place. This helps build independence between your fingers.
Another good exercise is simply pressing down on each fret, one at a time, on a single string and picking it cleanly. Make sure each note rings out clearly without buzzing or being muffled. This helps you understand how much pressure you need to apply.
Understanding Frets and Strings
Your guitar neck has metal strips embedded in it; these are the frets. When you press a string down behind a fret and pluck it, you shorten the vibrating length of the string, which changes the pitch. Each fret represents a half-step in music. Moving up the neck (towards the body of the guitar) makes the pitch higher.
Standard guitars have six strings. From thickest to thinnest (or low pitch to high pitch), they are typically tuned to E, A, D, G, B, and E. I remember this sequence with the phrase “Every Apple Does Good By Eating.” The thinnest E string is often called the “high E” and the thickest the “low E.” Understanding which string is which will be fundamental as you start learning chords and melodies.
Simple First Chords Everyone Should Learn
Learning a few basic open chords is usually the first major step for guitarists. “Open” means you’re using some strings that aren’t fretted (they’re played “open”).
Two essential chords to start with are G major and C major. These are widely used and, once mastered, open up a lot of song possibilities.
For G major, you’ll typically place your middle finger on the 3rd fret of the low E string, your index finger on the 2nd fret of the A string, and your ring finger on the 3rd fret of the high E string. You can then strum all six strings.
For C major, you’ll place your ring finger on the 3rd fret of the A string, your middle finger on the 2nd fret of the D string, and your index finger on the 1st fret of the B string. You usually only strum the top five strings (starting from the A string) for C major.
Don’t get discouraged if they don’t sound perfect right away. It takes time and practice for your fingers to get used to the shapes and for the notes to ring out clearly.
Daily Practice Routine Suggestions
Consistency is far more important than long, infrequent practice sessions. Even 15-20 minutes a day can make a huge difference.
Here’s a simple routine I often recommend:
- Warm-up (5 minutes): Start with finger exercises like the spider walk or simply pressing and picking individual frets. Focus on clean notes.
- Chord Practice (5-7 minutes): Work on one or two new chords, making sure each note in the chord rings out clearly. Practice switching between two chords you know. For example, try switching from G to C smoothly.
- Song Practice (5-8 minutes): Apply your new chords to a simple song. There are many easy beginner songs that use just G and C, or a few other basic chords. Playing songs keeps it fun and shows you the purpose of your practice.
Remember to take short breaks if your fingers get sore, and always end your practice on a positive note. Celebrate small victories, and remind yourself why you started playing!
Understanding Guitar Maintenance
Having a guitar is excellent, but keeping it in good shape is just as important as learning to play it. Proper maintenance keeps your instrument sounding good, playing easily, and lasting for years.
How to tune your guitar
Tuning is the first maintenance step you’ll learn, and you’ll do it every time you pick up your guitar. There are a few ways to tune. You can use an electronic tuner, which is often the easiest and most accurate method for beginners. Clip-on tuners attach right to your guitar’s headstock and sense vibrations. You just pluck each string, and the display tells you if it’s too high (sharp), too low (flat), or just right. Many phone apps also offer decent tuners. You can also learn to tune by ear, listening to the pitch of one string and adjusting the others relative to it, but that usually comes later.
String changing basics
Guitar strings don’t last forever. They lose their brightness, intonation can suffer, and they can even break. How often you change them depends on how much you play and your body chemistry, but generally, every few months for casual players is a good starting point. You’ll need a new set of strings (make sure they’re the right type for your guitar … acoustic, electric, or classical), a string winder (this saves your wrist), and some cutters.
To change a string, first loosen the old one until it’s completely slack, then carefully remove it from the tuning peg and the bridge. Next, take a new string and feed one end through the bridge (how it attaches varies slightly by guitar type). Then, guide the other end through the hole in the tuning peg on the headstock. Give yourself a little slack … enough for about two or three wraps around the peg … then start winding the peg to tighten the string. Make sure the string winds neatly downwards around the peg. Once it’s close to pitch, stretch the string a few times by gently pulling it away from the fretboard, then re-tune. This helps the string settle and holds its tune better. Repeat for all strings.
Cleaning and storing your instrument
Keeping your guitar clean helps preserve its finish and prevents grime buildup. A soft, lint-free cloth is your best friend. After playing, wipe down the strings and fretboard to remove oils and sweat. You can also wipe the body. For a deeper clean, specialized guitar polish is available, but use it sparingly and follow the product instructions. Avoid harsh household cleaners.
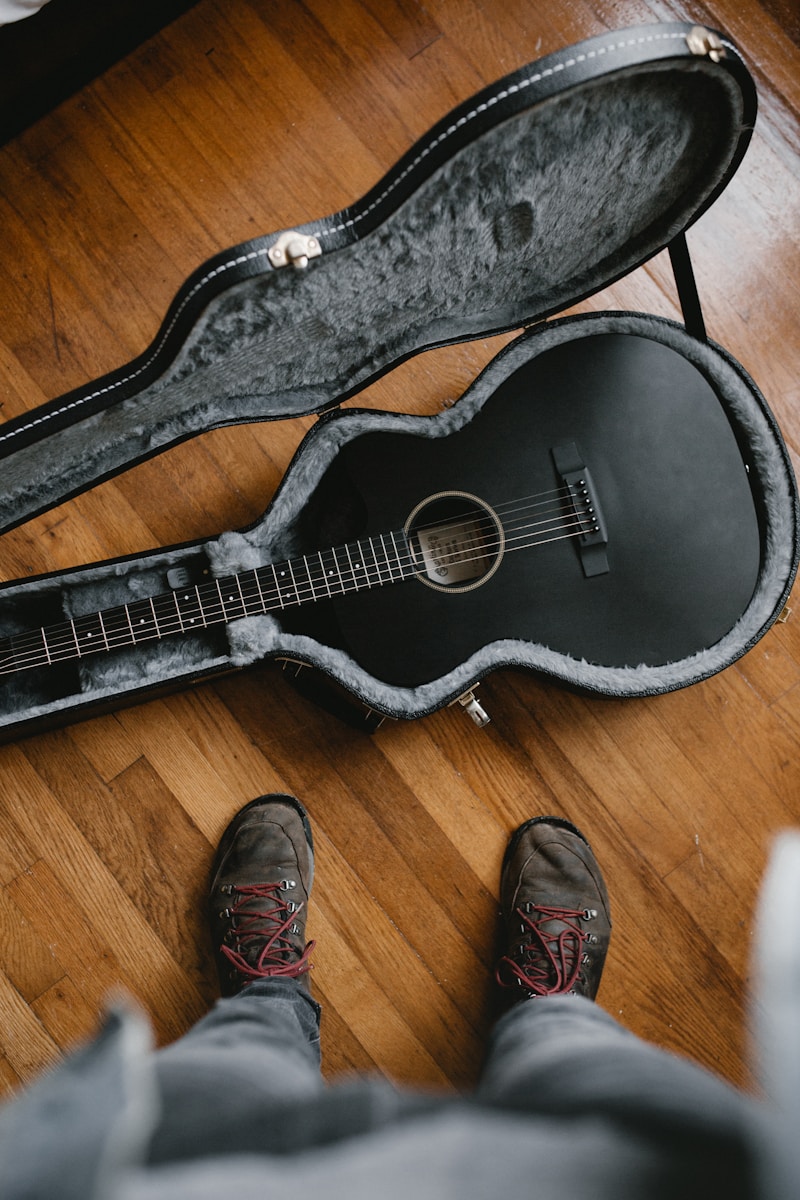
Proper storage is also crucial. When you’re not playing, keep your guitar in a gig bag or, even better, a hardshell case. This protects it from dust, spills, and accidental bumps. Avoid leaving your guitar in direct sunlight or near heat sources like radiators, as extreme temperature changes and humidity fluctuations can damage the wood. A climate-controlled environment is ideal. If your house is very dry or humid, consider a guitar humidifier or dehumidifier.
Developing Your Skills
Effective Practice Techniques
When you practice, focus on quality over quantity. Even 15-20 minutes of focused, intentional practice is far more effective than an hour of mindless strumming. My advice is to break your practice time into chunks. Maybe 5 minutes for warm-up exercises, 5-10 minutes for working on a specific chord progression or scale, and then 5-10 minutes for playing through a song or two. Consistency also beats intensity. Practicing every day, even just a little, builds muscle memory and reinforces what you’ve learned much better than practicing for hours once a week.
Moving from Basic to Intermediate Techniques
Once you’re comfortable with basic chords and strumming patterns, you’ll naturally want to expand your playing. This is where things like learning scales, arpeggios, and more complex chord shapes come in. You might start with the pentatonic scale, which is super versatile for lead guitar. For chords, consider exploring barre chords. They can be a challenge at first because they require more finger strength, but they open up a whole new world of songs you can play. Remember to take it one step at a time. Don’t try to learn everything at once. Focus on one new technique until you feel comfortable, then move on.
Learning Songs vs. Technical Exercises
Both learning songs and practicing technical exercises are important, and they serve different purposes. Technical exercises, like scales, arpeggios, and finger exercises, build your dexterity, strength, and understanding of the fretboard. They are like going to the gym for your fingers. Learning songs, on the other hand, puts those technical skills into a musical context. It’s where you apply what you’ve learned and start making music! My recommendation is to find a balance. Maybe spend part of your practice time on exercises and part on learning new songs. This keeps things interesting and ensures you’re progressing in all areas.
Recording Yourself to Track Progress
This is one of the most powerful tools you have. It might feel a little awkward at first, but recording yourself playing, even just with your phone, is incredibly insightful. When you play, you’re focused on performing. When you listen back, you can objectively hear where you might be speeding up, slowing down, missing notes, or where your rhythm might be off. It’s like having a silent, always-available teacher. It also serves as a fantastic way to track your progress over weeks and months. You’ll be amazed how much you improve when you can hear it for yourself.
Unlocking Your Guitar Journey
I’ve explored everything you need to know to start your guitar journey with confidence. I’ve covered the fundamental types of guitars, acoustic, electric, and classical, and broken down each instrument’s various parts and how they work to create sound.
When it comes to picking your first guitar, I’ve shared key considerations for beginners, including budget-friendly options and the pros and cons of starting with an acoustic versus an electric. I also highlighted essential accessories like picks, a capo, and a tuner, and discussed the best places to buy your instrument.
Getting started with playing involves learning proper posture and hand positioning, along with basic finger exercises. I walked you through understanding frets and strings, introduced simple first chords, and provided suggestions for a daily practice routine.
What are your biggest takeaways from this guide, and what part of learning guitar are you most excited to tackle first? Let me know in the comments below!